
Oscillating saw
Circular saw (optional)
Tile saw (for cutting tiles)
Caulk gun
Sponge
Disposable brush
Paint stir stick
Baby wipes
Instructions
Step 1: Plan tile layout
Arrange hexagon tiles to visualize the layout.
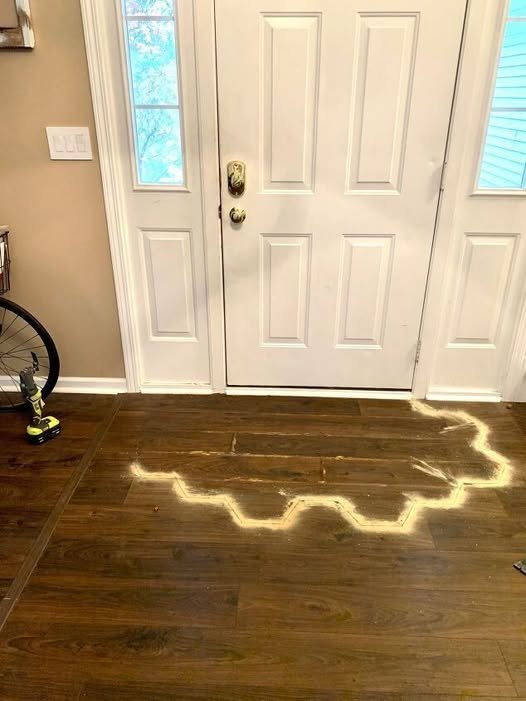
Clean the area and place tiles over the damaged section of the floor.
Trace the tiles’ placement on the floor with a marker.
Step 2: Remove old flooring
Use an oscillating saw to cut along the traced line and remove old flooring.
For straight cuts, a circular saw can be used, but set the depth to avoid cutting the subfloor.
Dispose of the old flooring properly.
Step 3: Apply waterproofing
Spread Schluter Kerdi membrane over the cleaned floor.
Paint AquaDefense liquid membrane on top of the Kerdi membrane.
Ensure the area under the door is also waterproofed.
Step 4: Mix mortar and lay tiles
Mix rapid-setting thin-set mortar in a bucket.
Spread mortar evenly over the floor.
Place hexagon tiles one by one, starting with the edge tiles.
Adjust spacing and wipe away excess mortar.
Step 5: Grout
Mix grout as instructed.
Fill gaps between tiles, wiping off excess with a sponge.
Use baby wipes to remove remaining grout film from the tiles.
Step 6: Caulk edges
Apply caulk along the edges between the tiles and existing flooring with a caulk gun.
Smooth the caulk with a baby wipe for a clean finish.
Congratulations! You’ve successfully transformed your entryway with a durable and stylish tile “rug.” This project not only solves the problem of ruined flooring but also adds a unique and eye-catching touch to your home.
ADVERTISEMENT

